macrina’s guatemalan hot chocolate bread

DSC_8166 - Version 2

I truly believe that bread baking is equal parts magical and maternal. Perhaps it’s because I’m making the yeast come alive… letting it grow up… kneading it gently… giving it space to proof and then baking it to create the loaf. Poof! And then you have bread! The whole process from start to finish is a bit of holding my breath and wondering if I’m doing everything right? Sound like parenting?

Baking bread is a perfect project for two. There is a lot of waiting and a friend always helps speed time along. And tea. Get ready to consume copious amounts of tea while chatting about weekend plans, husbands, current book club books, etc. Bee and I couldn’t help ourselves to peek in on the proofing loaf throughout the waiting period. We told the little loaf to “grow up big and strong.” I found myself whispering and tiptoeing around while the little baby loaf was proofing. So much can go wrong but then again, so much can go right. And having a great recipe always helps!

DSC_8092

This recipe is from one of our favorite Seattle bakeries, Macrina. If you’re local to Seattle then you probably know this bakery well. If you’re not familiar with the name – I’m sorry to inform you but you are missing out! The bakery has two locations. I’m a bit partial to the Belltown location because it’s the spot where I first tasted their rustic baguette with butter. So simple but so good. God help me if I ever develop a gluten intolerance. I love carbs but I especially love bread. And I love toast. Toast! So it’s no wonder how this amazing recipe is finding it’s way on to our blog. The Macrina cookbook is phenomenal for anyone who has the desire to create lovely bread loafs as well as other delicious treats from the bakery. My copy was a gift from a colleague who understands my passion for baking. She bought it at the bakery but you can also purchase it on Amazon. We’ve made a few minor adjustments to the recipe so for the real deal you’ll need the book.
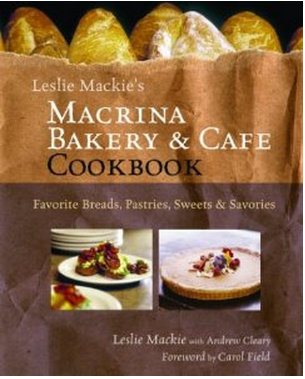
Copyright 2003 by Leslie Mackie, all rights reserved excerpted from Macrina Bakery & Cafe Cookbook by permission of Sasquatch Books

Copyright 2003 by Leslie Mackie, all rights reserved excerpted from Macrina Bakery & Cafe Cookbook by permission of Sasquatch Books.

Yields 1 round loaf

Ingredients

  • 1/3 cup whole almonds
  • 4 tablespoons unsalted butter, chilled
  • 1/2 cup whole milk
  • 2 teaspoons dried yeast
  • 1/4 cup granulated sugar
  • 1 teaspoon pure vanilla extract
  • 1/4 teaspoon pure almond extract
  • 2 eggs
  • 1/4 cup dark cocoa powder, sifted
  • 2 1/4 cups unbleached all-purpose flour
  • 1 teaspoon kosher salt
  • 3 ounces bittersweet chocolate (we used a 70% cocoa bar)
  • Cinnamon, sugar, brown sugar
  • Spray bottle of water

Cut butter into dime-sized pieces and set aside to reach room temperature.

Preheat oven to 350* F. Place almonds on a rimmed baking sheet and toast for 15 minutes, or until golden brown. Set aside to cool.

Warm milk slightly in a small saucepan and pour into bowl of stand mixer. Add yeast, 1 tablespoon of the sugar, and vanilla extract. Whisk to dissolve yeast. Then let the mixture rest for about 5 minutes while yeast blooms. Foam should form around the edges of the mixture and it should puff up a bit.

DSC_8071

Add remaining sugar, almond extract, eggs, cocoa powder, flour, and salt. Using the hook attachment, mix on low speed for about 2 minutes to bring ingredients together. Increase the speed to medium-low and start to slowly add butter to dough. Continue mixing for 12-14 minutes. Dough should look satiny and stringy. Let dough rest for 5 minutes.

While dough is resting, coarsely chop bittersweet chocolate and cooled almonds. Add almonds and bittersweet chocolate to dough and mix on low to incorporate.

Macrina Bread Collage_Chopping

Remove dough from bowl on to a lightly floured work surface. Shape into a ball. Place dough into a lightly oiled, medium sized bowl. Cover with plastic wrap and towel. Let proof in warm room p, 70 to 75*F, for 2 hours. Tell your baby loaf to grow up big and strong! Dough will almost double in size!

DSC_8123

Remove cover and return dough to floured surface. Gently flatten the dough to work out air bubbles. Then pull the edges of the dough to the top. Continue to work the edges to the center, top of the dough until a compact ball of dough is formed. Place on a baking sheet lined with parchment paper. Cover with plastic wrap and towel. Let dough proof for an hour.

While loaf is proofing, preheat oven to 350*F.

This is a good time to make a cinnamon-sugar mixture. Take a 1/4 cup measuring cup and fill half way with light brown sugar. Then fill the remaining space with granulated sugar. Put sugars in small bowl. Add cinnamon to taste. Mix with fork.

Remove cover and mist loaf with spray bottle of water. Sprinkle cinnamon-sugar mixture on to loaf. Place baking sheet onto center rack in oven and bake for 45 minutes or until loaf is rich brown and sounds hallow when tapped on the bottom. Let cool on a wire rack.

DSC_8177

End result? This loaf is guaranteed to disappear from your cupboard. It’s sweet but not over the top. And it’s especially delicious when toasted, buttered and sprinkled with the remaining cinnamon-sugar mixture on top. You’ll never think of skipping breakfast again!

currently crushing on… the treasures of kenwood house (or, how we fell for joshua reynolds)

exhibit

Seattle’s weather forecast for the weekend is looking pretty bleak, huh? If you’re searching for an indoor activity besides watching the Academy Awards, look no further than the SAM. The Treasure of the Kenwood House exhibit features 48 pieces from Rembrandt, Van Dyck, Gainsborough and their contemporaries.

We dedicated our Thursday afternoon to perusing the collection and were pleasantly surprised by our connections to some of the paintings. And what struck us might not be what you expect… Of course the main attraction is the famous Rembrandt self portrait, and this is already enough to make it worth the ticket, but we also found ourselves intrigued by more intimate, less well-known pieces. For instance, don’t overlook the portraits of scandalous social climbers Kitty Fisher and Emma Hart, whose angelic faces hide some of the most extravagant lives. Lindsay Lohan’s got nothing on these ladies!

Sir Joshua Reynolds‘ portrayal of one of the most notorious British courtesans (high-class prostitute) of the 18th century, Kitty Fisher as “Cleopatra” dissolving the pearl, piqued our curiosity about the “impertinent” woman who apparently wore “diamonds worth five hundred thousand francs”. Emma Hart, another one of Joshua Reynolds’ “good friends”, also captured our attention. But it wasn’t a Reynolds portrait of her, rather George Romney’s Spinstress (mistress?) that was featured. One would never guess that such a genuinely beautiful and inviting woman had such a turbulent life. From the slums of London, she gradually climbed the social ladder to become one of the most acclaimed European muses, before ending quite miserably, alone and destitute.

Kenwood_SAM

From Kenwood House, London, to the SAM…
Photos by Flickr users canonsnapper (left) and Antonio Campoy Ederra (right).

But it was not only the women who provided a bit of intrigue. Man in Prince of Wales Livery from Joshua Reynolds (who else?), initially thought by art experts to be the Prince of Wales himself turned out to be a mere gentleman in royal livery attire. We could not help but wonder who commanded this to be done. Only people from a certain social rank could afford such honors. Perhaps a mysterious wealthy woman commissioned a portrait of her lover? Or was he the secret child of a member of the royal family? We let our imagination run wild in the SAM Taste Café

If you’re not really into classical European art but still want to explore the art scene, we highly recommend the Tony Taj gallery just across the street. You will discover a local artist combining traditional and digital media with lots of flair.

Have a wonderful weekend,

Bee & Em.

sprucing up your bouquet

wilting 1

This is what my Valentine’s Day bouquet looks like after daily water changes and fresh cuts. Despite my efforts, the tulips are gonzo. Most of the flowers are still lovely but the arrangement is looking a bit haggard, no? It needs some serious sprucing. And while I’m at it… I’m going to rearrange the bouquet into mini bouquets. I have a bunch of glassybabys that are so darn cute and flowers make them even cuter.

In Monday’s post, I mentioned that it’s really important to separate the flowers and truly see what you are working with. The lemon leaf, lilies, roses, alstroemeria, and hyacinths are all in pretty good shape. I also picked up a bunch of wax-flower at the market because I think it will add a softness to the mini bouquets and I love the lemony smell.

loose flowers1

Let’s get started! Pick out your new containers. Don’t have glassybabys? Mini jam jars work great or reuse glass cream or milk jars. Your containers need not match! Fill up your petite containers with fresh, cold water. Cut your greens to fill the new containers. If you remember anything from this post remember this… once you cut your flowers the length is gone. It will not come back. I usually cut each stem a bit at a time until I have the length just right. Follow along with the wax flower (also called chamelaucium) and then alstro, roses, hyacinths and lilies. Pretty simple, huh?

Collage1

Collage2

How darling are these? Perfect for the dinner table or on the nightstand. Line them up or separate them around the flat.

Collage3Enjoy your mini bouquets!

XOXO, Em

arranging loose flowers

Collage_FlowersBee and I have often joked about how we would love for our husbands to bring home flowers on randoms days – not just on the “required” days… ie. Valentine’s Day or anniversary, etc. A spontaneously gifted bouquet seems more meaningful than a bouquet on a commercial holiday.

Flash back to 7 years ago when my husband and I were in the early stages of our courtship… I told him that I didn’t need flowers on Valentine’s Day and that it was silly to spend a bunch of money on a “canned” bouquet. Of all the times for him to listen to me! I was crushed but I learned an important lesson about myself. I do want flowers on Valentine’s Day because I love flowers and I love to be loved. Yes, I want them randomly as tokens of my husband’s affection. But let’s be honest here – I’m a romantic and I want flowers. Period.

edited flowers5_againThis year, since my husband and I traveled for the President’s Day weekend holiday, he surprised me with an early Valentine’s Day loose flower bouquet. Not only do I love flowers but I find great joy in arrange them myself. It’s my chance to be creative with a gift I’ve been given.

Full discloser: I worked in a flower shop for years. One thing I noticed about the clientele was that people were hesitant to give/receive flowers in the form of a loose floral bouquet. Me? I have plenty of containers and would much rather spend the money on the flowers. But I thought about this objectively. Perhaps people are overwhelmed to receive a whole bouquet…. they aren’t sure what to do with it. My advice? As with most things in life, take it step-by-step.

First, open the bouquet and separate everything. It might seem silly but you need to get to know what you are working with. These should be on a large work surface – all separated. Truly see it. My bouquet consists of: lemon leaf, lilies, roses, alstroemeria, tulips and hyacinths. Fill a container with fresh water and add your greens. These are your base. Work in the roses, one at a time. Then, the alstro (again one at a time), then the lilies, then the tulips, then the hyacinths. Remember to give each stem a fresh cut as you go and work the arrangement from all sides.

Now, our hard work is showcased in a lovely flower arrangement. As the days pass, remember to change the water and give your flowers a fresh cut. Eventually, your bouquet will begin to wilt. Check back with us on Thursday and I’ll show you how to spruce up your arrangement. For now, enjoy your work of art!

edited flowers3_again

Have a great week!

XOXO, Em

currently crushing on… paris eastside

Paris_eastside

As planned, I spent Valentine’s evening cooking with the hubby at a little French cooking school nestled in the heart of Capitol Hill. I recently took in a crêpes-making demonstration with Muriel Foucher from Paris Eastside. Well, after following her “real” cooking class last night, I have even more reasons to recommend her. Muriel just knows how to bring the right modern twists to traditional French cuisine. She put us at ease right away, giving us aprons while explaining the recipes and giving the first instructions. We kneaded dough, chopped veggies, rubbed tuna with spices and finally enjoyed a delicious, well-deserved dinner. She also shared some valuable tips for food and wine pairing. But beyond tips and hands-on action, Muriel painted a larger picture of French cuisine and culture — whether by explaining what the “apéritif” is or telling us how she once tried to smuggle some dried veal stock through customs. And seeing my husband cooking outside of his comfort zone (and hopefully adding a couple of recipes to his repertoire) has no price. By the way, she’s hosting a wine and chocolate pairing this evening from 5pm to 7pm for only $5. I might come by, and you should too.

paris_eastside_dinner

Have a long and relaxing weekend. I’m personally planning to finish watching the first season of House of Cards (if you’re not already addicted it’s seriously time to catch up), to indulge in some vegan food with friends at Plum and attend a reprise of the Seattle’s symphony Valentine’s program. Em will be off to Colorado but she already has something in the works for us, and it has to do with flowers. I’m not saying anything more; come and check us out on Monday.

Bee

♥ cute DIY cards for your valentine ♥

all_cardsWe know what you are thinking… WHO HAS TIME TO MAKE A VALENTINE’S DAY CARD?! Ummm. We do. And so do you! These cards are so easy and require little time and just a few materials.

What you’ll need:
♥ good quality paper/card stock
♥ stamps / ink pads
♥ watercolor paint set
♥ scissors
♥ X-Acto knife / blade
♥ glitter (yes! you know you love glitter)
♥ Elmer’s school glue
♥ a nice pen
♥ a pencil
♥ ribbons
♥ what ever else you can rummage up

Bee is a bit more artistic than I so she tried out her hand with the paint set. She also feels comfortable using the X-Acto knife. Yikes. That’s not really my thing. I’m more of a stamp-glitter-ribbon kind-of-girl. And that is totally okay. Remember, a Valentine is a note of your affection and it’s from the heart. When it’s homemade, it’s so much sweeter.

Below, you find a few of our ideas. Maybe they’ll inspire you to nix the mass produced greeting cards. Go ahead, break out the sparkles, craft up some cupids, and wax poetic.

Cut-outs (difficult + easy):
Bee tried out a few different techniques with cut-out cards. I think they are both really super. I also love that she is catering to two different skill levels. The first option highlights ideas from Ashley Pahl Design, featured in I ♥ Stationary. You’ll need an X-Acto knife for the precise cut-outs. It is a bit tricky at first but Bee said once she got going, the process moved along quickly. Simply trace / draw your pattern in pencil and shade in the area that you plan to cut out. With the X-Acto knife, remove the shaded area. Glue red or pink (or whatever color you wish) on the bottom half of the inside of the card. Voila!

cut_out_cards

Perhaps you like the idea of the cut-out card but your skill level is more beginner. This classic candy heart cut-out is so sweet and simple. Same process, less detail.
simple_cut_out

Stamps:
I love stamps. They are quick, super easy, and reusable for years. For the background on both cards I simply used a damp sponge to apply red ink. On one card I stamped on a simple Valentine greeting and hearts. This took all of 30 seconds. You can do this! However, the repeated love phrases required a bit more of my time and my concentration. If you have a nice black pen and a few love phrases to repeat, you are set.
stamps

Sparkles:
Glue + Glitter = heaven. Any excuse is a good excuse to get messy with glitter. This sparkle card shines bright.
big_sparkling_cardWatercolor:
The mini hearts are melting my heart. Bee said that she practiced her penmanship with the brush before she committed it to card stock. Looks like she nailed it! I might suggest a ruler to guide you along the card. Make sure your watercolor isn’t water logged or your lovely message / design will drip as you let it dry.

watercolor_cards

Online:
Maybe you’re new to this DIY concept and at this point – overwhelmed. First, take a deep breath. Second, visit Tagul and create your Valentine’s Day card in moments with just a few clicks.

sparkling_cardNo matter how you craft your card, it’s made with love. Well done.

Happy Valentine’s Day!
X❤X❤X❤, Em