the essential northwest pie: blueberry and peach

lavender peach blueberry pie

The Northwest is home to many delicious fruits. Every summer we’re blessed with abundant yields of locally grown fruits, including peaches and blueberries. (Georgia may be the Peach State, but we hold our own here in Washington.) We are now entering the peak peach season, when it’s easy to find premium-quality fruits, even at the supermarket.

Last September, one of my husband’s colleagues gave us about 10 pounds of ripe golden peaches that he had just picked in an orchard. Those were the best peaches I had ever had: fresh, juicy and so intensively flavorful. The only inconvenience? The fruits don’t keep very long in the hot summer weather. So we took to canning — heating up our already warm kitchen filling jar after jar with peach jam and peach salsa.
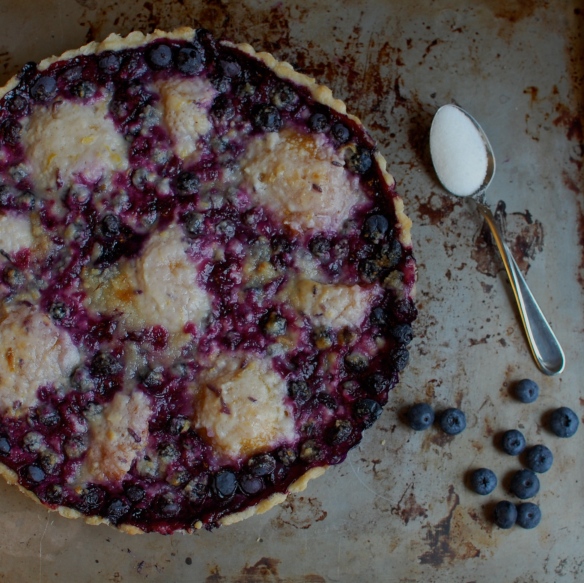
peach & blueberry pie

Peach and blueberry is one of my favorite fruit combinations: The two flavors greatly complement each other, and the fruits look great together. Somehow, they just capture the fragrance and feel of summer. My go-to breakfast is a handful of blueberries, a sliced peach and a spoon of cottage cheese. Sprinkle some crushed walnuts on top and enjoy! I’m also a big fan of blueberry peach crumbles, pancakes, cobblers… But surprisingly enough, I had never made a pie. It was high time to give it a try. Nothing celebrates summer as much as a fruit pie.
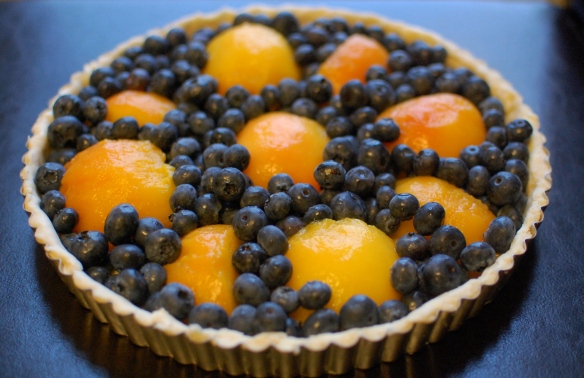
fruits pie

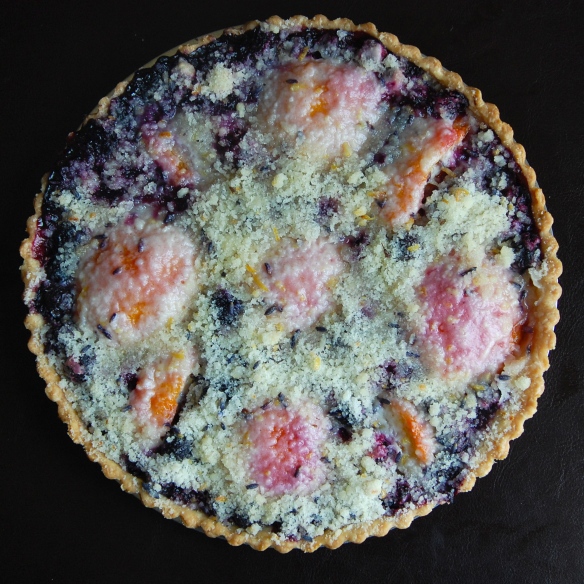
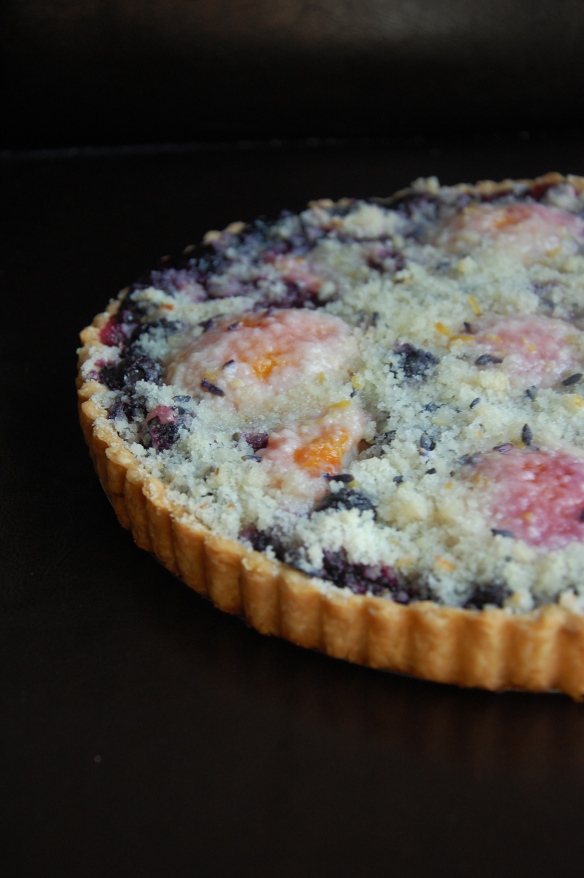
A pie, yes, but with a twist: No double crust for my pie. I had something more subtle and delicate in mind, something that would enhance the flavors of the fruits rather than overpower them with a buttery crust: a crumb streusel with lemon zest and lavender buds (from my harvest session in Sequim few weeks ago). Just enough to add some layers to the taste of the pie without detracting from the sweetness of the peaches and the floral perfume of the blueberries. A true Northwestern pie with locally grown peaches, blueberries and lavender. All the flavors get a chance to shine and it makes a beautifully perfumed combination.
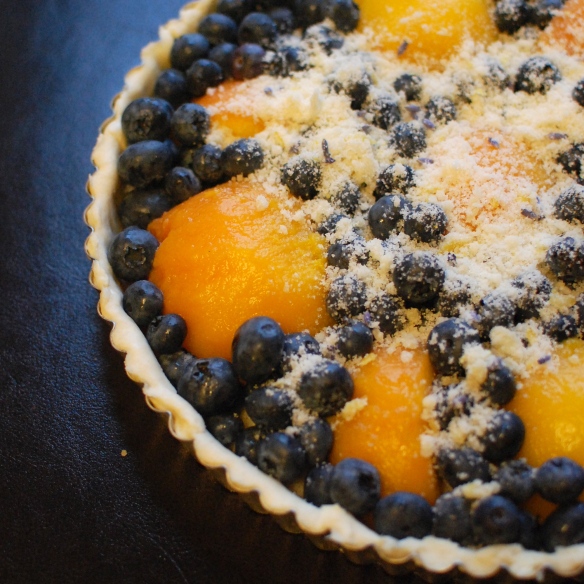
uncooked pie

The key to a delicious pie depends on the quality of the fruits you use — ripe but not too soft, sweet with a balanced tanginess — as much as on the consistency of the crust: Never settle for anything less than light and flaky. In a previous attempt, this pie gave me some trouble with the crust being too soggy and the blueberries turning into a soup. I finally nailed it after choosing to pre-bake my crust and add a little cornstarch to the blueberries to thicken their juices. (Note to self: Shortcuts are never good when baking.)

fruits pie with crumb topping

As for the final product, it’s definitely a keeper. The crust is nicely flaky and lemony, the crumb topping is light and airy which really allows the fruits to shine. This must be the taste of sunshine.

Blueberry, peach and lavender pie

yields one 9-inch pie

Ingredients

For the crust (with a zing)

  • 1/2 cup water
  • 1 3/4 cups all-purpose flour
  • 2 teaspoons sugar
  • a pinch table salt
  • 1 teaspoon finely chopped lemon zest
  • 1 stick unsalted butter, very cold and diced

For the filling and crumb topping

  • 4 tablespoons flour
  • 1/2 to 2/3 cup sugar (depending on the sweetness of the fruits)
  • 2 teaspoons lemon zest
  • 1 tablespoon lavender buds
  • 2 tablespoons unsalted butter, diced
  • 3 ripe peaches
  • 1 cup of fresh blueberries
  • 2 tablespoons cornstarch
  • 2 tablespoons lemon juice

For the lemony crust

Pour the water in a cup and add a few ice cubes. Keep aside. In a large bowl, combine flour, sugar, salt and lemon zest. Add the dices of very cold butter and, using a pastry blender (or your fingers), work the mixture for few minutes, redistributing it as you go so that everything is worked more or less evenly. Stop when the butter pieces are the size of small peas. Don’t worry if there are still some bigger chunks of butter. You actually want them to improve the flakiness of your crust.

Drizzle about 1/4 cup of cold water over the mixture and gather the dough together with a spatula. Add more water if necessary, one tablespoon at a time. Transfer dough to a lightly floured work surface and knead it gently. Wrap in plastic and chill dough in the fridge for at least one hour (and up to two days).

Butter and flour your pie tin. Roll dough on a lightly floured surface and transfer to pie tin, gently pressing dough onto bottom and sides up of the dish. Pierce the bottom of the crust with a fork and place in the fridge until firm, at least 30 minutes. Trust me, the colder the better. It will help the crust keeps its shape and size while baking.

Preheat the oven to 375°F. Line crust with foil or parchment paper and fill with pie weights (or rice). Place the pie tin in the middle of the oven, on a baking sheet and bake until crust is set, about 20 minutes. Carefully remove parchment and pie weights and put the crust back in the oven for another 12 minutes, until crust is pale golden. Transfer to a wire rack and let cool.

For the filling and crumb topping

Mix together flour, sugar, lemon zest and lavender buds in a small bowl. Using the pastry blender (or your fingers), cut in the butter until the mixture resembles a coarse meal. Set aside.

To peel the peaches, bring a large pot of water to a boil and prepare a large bowl of ice water. Using a sharp knife, cut a small “X” through the skin at the base of each peach. Put the peaches in the boiling water and blanch them for about 40 seconds. Transfer the blanched peaches to the bowl of ice water with a slotted spoon. Let them cool for about 1 minute and then drain the peaches and pat them dry. The skin should easily pull away. Halve the peaches, remove the pits and set aside.

Toss gently blueberries and cornstarch in a small bowl and set aside.

Sprinkle a third to half of the crumbs in the bottom of the pie shell (to absorb the juices). Place the peach halves face-down in the crust and spread the blueberry mixture between them. Drizzle with lemon juice and cover with the remaining crumb topping.

Bake at 375°F for about 30 minutes, until the crust is golden brown and the blueberries are bubbling. Let cool before serving. The crust will be crispy and the filling should not run. Sometimes perfection is as simple as a pie.

One last thing: Do you remember the Presidents of the United States of America (which apparently is a band from Seattle)? Yes?… No?… Well, let me refresh your memory: “Millions of peaches, peaches for me“… It has become just impossible for me to think about peaches without having this song stuck in my head (thanks to the hubby for introducing me to such a monument of American music). I thought I should share it with you. You’re welcome!

Bee

have pie will travel

have pie will travel

Looking back to the summer vacations of my youth, I fondly recall the blistering hot days in New England when my mother and I would truck over to the u-pick berry farm and fill our bellies and pails with as many blueberries possible.  Most of the time the berries brought home were consumed by the handful. We enjoyed their perfection as nature intended.

No one complained that the berries weren’t safely nestled in pie crust because my mom never baked pie and we didn’t really know what we were missing. Don’t get me wrong, my mother is one of the best cooks ever. Her lasagna is so good that I can’t order it anywhere else because I’ll only be disappointed. But she’s never been much of a baker. Maybe it’s a sweet or savory thing. Sure, she makes brownies and sweet breads but never pies.

I get nostalgic for those hot summer days of blueberry picking. I miss the quietness of the farm. The scorching sun. Sweat mixing with sunscreen. Dusty feet in sandals. The long stretches of silence as my mother concentrated on picking out the best berries and I concentrated on stealthly eating more berries than the number that ended up in my pail. And consequently, my mother scolding me for eating too many berries.

Sure, I could drive up to the u-pick berry farms north of Seattle. But it wouldn’t be the same. Who would advise me not to eat all those blueberries? Gosh, I might not return with any… just a belly full of berries. And lately, I’ve been busy so it’s easier to run over to the traveling farmer’s market and pick up a few pints. As July runs out of days in the month it dawned on me that most of the berries purchased have been eaten by the handful. No berries have been safely nestled in pie crust. As a person who loves to bake, this feels almost criminal!

I know – I said I’d cool it on the baking for a little while but let’s be honest here, it was only a matter of time before I broke down and returned to the kitchen. (Must. Bake. Pie.) Plus, my hubby and I were getting ready for a road trip to Bend, OR (for yet, another wedding!) and I nominated myself to take care of the sustenance. The idea of a summertime road trip just beckons for a little picnic. And what picnic could ever be complete without something sweet? This road trip would be the perfect opportunity to try out blueberry pocket pies.

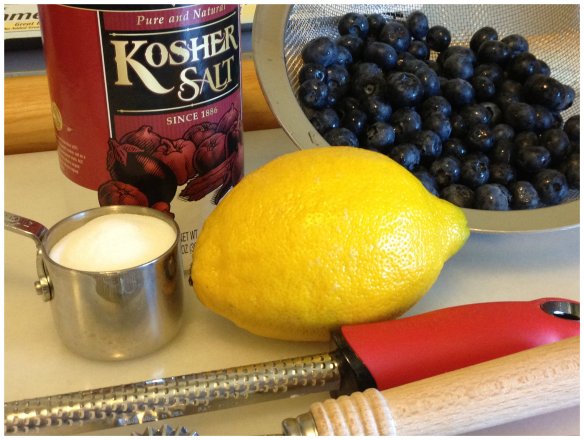
They are simple to make and super portable. All you need is love… and these ingredients:

all you need

Blueberry pocket pies

Yields 6 pocket pies

Ingredients

  • 2 cups fresh blueberries
  • 1/4 cup sugar
  • 1 tablespoon fresh lemon juice
  • 1 teaspoon fresh lemon zest
  • 1/4 teaspoon kosher salt
  • pie dough – insert your favorite recipe (I use a butter and shortening dough recipe)

Pre-heat the oven to 400°.

Mix the blueberries, sugar, lemon juice, lemon zest and salt in a medium mixing bowl. To reduce trauma to the berries, simply mix by hand.

When the oven is just about done preheating, begin to roll out the dough. It was hot in my kitchen so I needed to return the dough to the refrigerator several times to keep the dough cold.

Once the dough is rolled out into a long thin sheet, divide it in half and then into thirds. Then scoop berries into each section and form into pockets.

A break down of the steps to pocket pie:

step by stepBake the little pies in the oven for 35-40 minutes.

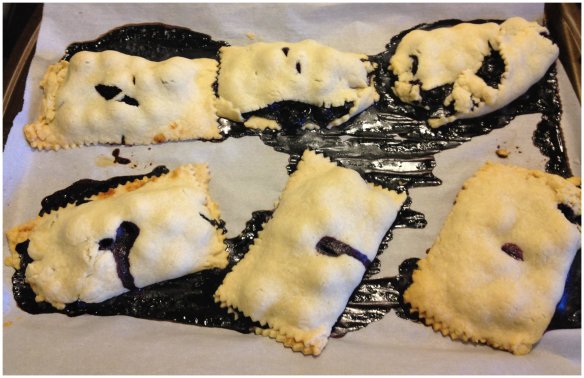
Here is the result of my first batch:

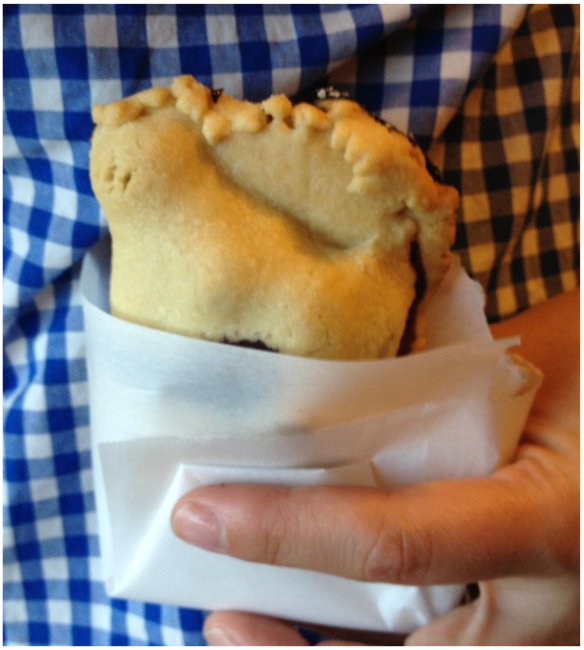
unciviled pocket piesI thought they came out rather uncivilized so I ended up making several batches. In the end… not a single batch looked perfect. I suspect it has something to do with the fact that I kept trying to over-stuff the little squares of dough with too many berries. But oh! The taste was heavenly. The crust was buttery and crumbly and the fruit inside was sweet but not overly sweet. The blueberry flavor remained true with just a zing of lemon. At some point I told my husband that these little pies were “pie-crack.”

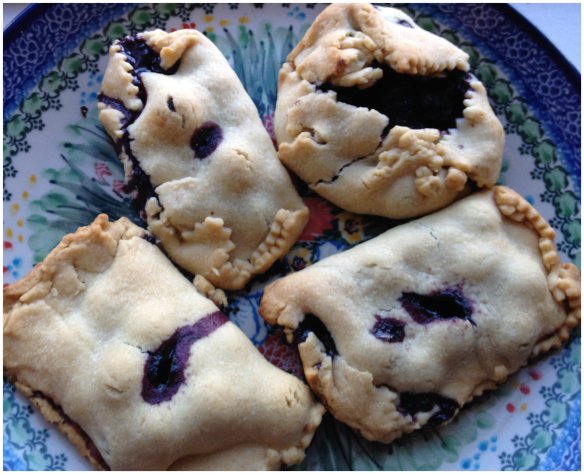
pies on a plateWe brought a pair of pies on the road trip to Bend. Between the piping hot coffee and the high I was riding from the pie – it’s a good thing I wasn’t driving.

I’m thinking about trying these out with sweet cherries or maybe a blueberry peach combo. Bridesmaid dresses (and any other fashion for that matter) be damned. I’m back in the kitchen baking and I’m going to enjoy the fruits of summer.

Have a super week!

XOXO, Em

let them eat ice cream (for the pool-less on a hot day)

photo (1)

A recent acquisition in my kitchen is an appliance that I probably would never purchase. It is, however, an appliance that someone might buy raffle tickets to win but after the excitement of the prize, it might sit in the basement, forgotten about until spring cleaning. That someone is a very kind colleague and the prize appliance is the Cuisinart Soft Serve Ice Cream Maker. My colleague asked if I would like the long forgotten ice cream maker. Without any hesitation (who would hesitate? It’s a FREE ICE CREAM MAKER!) I said yes and long story short, I, Em of deuxdilettantes, am the proud owner of a soft serve ice cream maker.

The timing of this addition to my kitchen couldn’t be any more perfect. With the recent change of temperature (hello Lake Washington, my savior from the heat), a bit of homemade ice cream felt just right. I invited Bee to join me in the christening of the ice cream maker. The whole event was a bit comical. It must have been 90 degrees in my flat. I don’t have AC and the windows hardly open. We watched the neighbors frolic in their pool as we made ice cream and wondered if we could tempt them with cool treats so that we might take a dip in the refreshing water. I’m pretty sure we made all the rookie mistakes as we created a lovely ice cream mess in my kitchen.

IMG_2473

It was messy (and that picture was taken after we cleaned up) but we had a blast. And we ended up with darn good ice cream.

Even if your not crazy about our flavor combinations, at least consider the following two tips:

1. The freezer bowl MUST be cold. The owner manual suggests 12 hours in the freezer but I suggest 24 hours just to be safe.

2. Adding anything solid (dare I suggest chocolate chunks?!) to the milk/cream liquid mixture WILL clog the machine and create a mess. We suggest allowing the mixture to thicken and then add, slowly.

photo

Lavender cardamom vanilla with chocolate chunk ice cream

Yields 1.5 pints

Ingredients

  • 1 cup whole milk (plus extra)
  • 1/4 cup lavender
  • 10 pods cardamom (split open)
  • 1/4 teaspoon vanilla
  • 1/2 cup sugar
  • 2 cups heavy cream (very cold)
  • 1/3 cup coarsely chopped dark chocolate

1. Combine 1 cup milk, lavender, cardamom and vanilla in a medium sauce pan. Bring to simmer and then reduce heat to low / low-medium. Gently stir and cook for about 20 minutes.

IMG_2458

2. Strain mixture and discard lavender buds and cardamom pods. Pour the mixture into a measuring cup and top off milk mixture to measure 1 cup. Put in refrigerator or over an ice bath.

3. Once milk is cold, pour into a mixing bowl and add sugar. Whisk or mix until sugar is dissolved. Then add cream. Mix and pour into freezer bowl. Turn on ice cream machine and let it do its magic.

4. As the milk/cream mixture starts to thicken to a soft serve consistency begin to add chocolate chunks a small spoonful at a time. Once the mixture is past soft serve consistency but prior to ice cream, turn off the machine and begin to scoop out ice cream into a freezer safe container. Freeze until mixture has hardened and then serve! Or serve immediately as soft serve!

Dutch chocolate with cinnamon and chocolate chunk ice cream

Yields 1.5 pints

Ingredients

  • 2/3 cup unsweetened Dutch processed cocoa powder
  • 1/2 cup sugar
  • 1/3 cup firmly packed brown sugar
  • 1 cup whole milk (very cold)
  • pinch cinnamon powder
  • pinch cayenne pepper
  • 2 cups heavy cream (very cold)
  • 1/4 cup coarsely chopped dark chocolate

1. Combine the cocoa powder with sugars in a medium bowl. Mix until lumps are removed.

2. Add the whole milk and mix until smooth. Add cinnamon, cayenne and heavy cream. Mix and pour into freezer bowl.

3. Turn on ice cream maker and allow to mix.

4. As the milk/cream mixture starts to thicken to a soft serve consistency begin to add chocolate chunks a small spoonful at a time. Once the mixture is past soft serve consistency but prior to ice cream, turn off the machine and begin to scoop out ice cream into a freezer safe container. Freeze until mixture has hardened and then serve! Or serve immediately as soft serve!

DSC_2914

Strawberry with balsamic caramel ice cream

Yields 1.5 pints

Ingredients

  • 1/3 cup and 2 tablespoons granulated sugar
  • 1 tablespoon water
  • 1/3 cup balsamic vinegar
  • 1 cup whole milk (very cold)
  • 1/2 cup firmly packed brown sugar
  • 1 teaspoon vanilla
  • 2 cups heavy cream (very cold)
  • 1 pint strawberries, hulled and pureed

1. Combine the granulated sugar, water and balsamic vinegar in a shallow pan. Bring to a boil and then reduce heat. Let simmer for about 15 minutes – until the consistency is thick and syrupy but not yet a caramel. Remove from heat and pour into a heat safe container. Set aside and allow mixture to thicken as it cools.

2. In a medium mixing bowl, combine the whole milk, brown sugar and vanilla. Whisk or mix until smooth. Then add heavy cream. Stir and then add to freezer bowl. Start mixing and as mixture thickens begin to add the strawberry puree, slowly.

DSC_2955

Allow mixture to continue to thicken and then slowly add the balsamic caramel.

DSC_2968

Once the mixture is past soft serve consistency but prior to ice cream, turn off the machine and begin to scoop out ice cream into a freezer safe container. Freeze until mixture has hardened and then serve! Or serve immediately as soft serve!

DSC_2982

As I write this, I realize that over the past week I have eaten more ice cream than I should ever admit to. But hey, that was all for research! It doesn’t count. We are dreaming up all sorts of ideas for the machine. There has been discussion of coconut milk… almond milk… sorbets… oh the possibilities!

Have a lovely week and stay cool. And eat ice cream!

XOXO, Em

a dessert for the lazy: the clafoutis

Clafoutis

Last weekend, as I was browsing the Broadway farmers market in Seattle, I suddenly realized that we’re right in the middle of le temps des cerises (the cherry season). I’ve been travelling so much recently that I completely lost track of the seasons. In France fresh cherries mean clafoutis, one of the easiest cakes you can make. It’s about as complicated as making pancakes or crêpes. Actually, no. It’s easier because you just have to throw it in the oven and wait. A clafoutis is a rustic dessert, filled with fruits, the consistency of which is halfway between a cake and a custard. Today, people make clafoutis with any seasonal fruit, but the true, authentic clafoutis is made with black cherries (griotte).

Cherries at the market

Cherries are like madeleines to me. They’re nostalgic and bring back lots of tender memories. While I was pondering whether or not to buy cherries, I thought about that beautiful cherry tree that still stands in my grandma’s garden and how every summer I would fight with the birds to pick the best cherries and be rewarded for my epic victory with an amazing clafoutis. Nothing can top my grandma’s clafoutis, but you will have to take my word for it, because even if I wanted to, I would be unable to give you the recipe. Not that it is a family secret, but my grandmother does it intuitively, without a scale or a recipe book, and it’s always delicious. She would rinse the cherries, lay them in a single layer in a dish, whisk together two or three eggs, add some flour, sugar, milk and cream and pour it over the cherries. Then she would bake the delicious mixture until the batter is just set with nicely browned and puffed edges.

Cherry Clafoutis

My recipe is slightly different and includes some almond powder, but everybody in France has his or her own take on this classic, notably when it comes to leaving in the pits or not… There are two schools of thought on this: The traditionalists recommend using unpitted cherries, as the pits supposedly release a nice flavor when the dish is cooked. But nowadays, the modernists prefer clafoutis with pitted cherries, since it’s easier to eat. Personally, I always leave the pits — not because I’m a traditionalist but, to be honest, I’m just lazy. I really think the story about the pits adding more flavor to the clafoutis is just a way to justify the cook’s laziness.

Cherries

Pick your cherries carefully. Choose the nicest fruits: plump, firm, shiny and juicy. I bought some Utah Giant cherries: They were very flavorful, sweet and slightly sour — an important detail if you don’t want your clafoutis to be overly sweet. Bing cherries would also be a good choice. Don’t hesitate to adjust the quantity of sugar based on the sweetness of your cherries.

Cherry clafoutis

Yields 8 servings

Ingredients

  • 1 tablespoon softened butter
  • 1 tablespoon golden brown sugar
  • A pinch of fleur de sel
  • About 1.5 pounds cherries (enough to cover the bottom of a baking dish)
  • 3 large eggs at room temperature
  • 1/2 cup golden brown sugar
  • 1/2 cup almond meal
  • 1/4 cup all-purpose flour
  • 1/2 cup heavy cream (10 cl)
  • 1 cup whole milk (25 cl)
  • Powdered sugar for dusting (optional)

Preheat the oven to 425°F.

Grease a baking dish, cast-iron skillet or a Pirex pie plate with the softened butter. Sprinkle the two tablespoons of brown sugar and the fleur de sel (my secret touch!). Wash the cherries, remove their stems (and their pits, if you want), and layer them in the prepared dish.

Cherries layered in a baking dish

In a mixing bowl, using an electric mixer if you like, beat the eggs with the sugar until the mixture almost doubles in volume. Gradually add the almond meal, flour, cream and milk, alternating between the dry and wet ingredients as you combine them. Mix until the batter is homogeneous.

Clafoutis batter

Pour the mixture over the cherries and place in the oven for about 40-45 minutes, until golden and puffed. If you desire, sprinkle with powdered sugar and enjoy lukewarm or cold (with homemade lavender-chocolate-chip ice cream, as Em and I did! — more details to come soon).

Cherry Clafoutis 2

strawberry-rhubarb pâtes de fruits

strawberries & rhubarb2As a child I had a terrible sweet tooth. I wish I could say that it has diminished but alas, this is not the case. What has happened is that I have developed a more sophisticated palate of sweet teeth.

It was no surprise then, for my husband to find me hovering over a large stock pot stirring up strawberries and rhubarb with copious amounts of sugar. He asked (again), “are you almost done?” And I sweetly replied, “no dear, you can not rush candy making.” You simply can not. Candy will not be rushed. Especially pâtes de fruits made sans gelatine or agar.

Pâtes de fruits, or fruit jellies, are wonderfully decadent sweet treats. But surprisingly, for a French confection that is sold in high-end pâtisseries, you’ll find it to be a simple recipe. Traditionally, it’s made with fruit, sugar, water and lemon juice. Nothing fancy there. I love that. Many American recipes add gelatine, agar or liquid pectin but I wanted to make the truest version of pâtes de fruits possible. Call me a purist if you must. I’ll own it.

So, in the spirit of science I forged on, experimenting to find a balance between the ingredients to create a natural occurring pectin that is found in the highly coveted little gems called pâtes de fruits.

Strawberry-rhubarb pâtes de fruits

Yields 1  12 X 9 baking dish (to be cut to your desire)

Ingredients

  • 1 pound strawberries (washed, hulled, quartered and then weighed)
  • 1 pound rhubarb (washed, trimmed and cut to 1 inch pieces and then weighed)
  • 1 lemon juiced
  • 1/2 lemon, zested (optional)
  • 2 tablespoons water
  • white baking sugar, extra fine
  • castor sugar, superfine

In a large stock pot, combine strawberries, rhubarb, lemon juice, lemon zest and water. Mix and turn stove temperature to medium (on a scale of 1-7, about 4). Cook for 20-30 minutes, stirring almost constantly. When the strawberries and rhubarb are soft and mushy, remove from heat and mash thoroughly.

mashed

Using a food scale, measure the weight of a medium bowl. Note the weight. Then push the mixture through a fine metal sieve into the bowl. This will take a bit of time, strength and patience. If you have a food processor, now is the time to pull it out of the cupboard!

After pushing the mixture through the sieve, weigh the bowl again and subtract the weight of the bowl. Return the mixture back to the large stock pot and match with an equal amount of extra fine baking sugar. Example: I had exactly 610g of strawberry-rhubarb mixture and I matched it with 610g extra fine baking sugar.

Cook over medium heat (4-4.5 on my stove top), stirring constantly. After 30-35 minutes, it should be dark, glossy and create a tail (shown below). Remove from heat.

action shot - tail

Pour into a baking dish lined with parchment paper. If you have a busy kitchen, gently drape an additional piece of parchment paper over the dish, taking care that it does not touch the pâtes de fruits. Set aside for 24-48 hours. Or bake (uncovered) at 150° F for 8 hours and then let rest for an additional 8 hours.

poured and ready to set

Once set, remove from baking dish and cut. I decided to go with classic squares but I think stars would rather smart.

Pour a small amount of superfine castor sugar onto a baking sheet and start to coat each side with sugar.

sugar fix

Work each piece, adding more sugar to the baking sheet as needed.

strawberry rhubarb pate de fruits

The result? Sweet, chewy goodness. I think they’re simply divine.

Enjoy! XOXO, Em

mini strawberry-rhubarb crumbles

mini crumbles ready to eatWith May just around the corner, Seattle is tiptoeing into the early stages of local rhubarb season. And even though it’s too early for the local sweet strawberries, we compromised with organic strawberries from California (still west coast so it’s sort-of local…) so that we could make a strawberry-rhubarb crumbly crumble. After much discussion, we thought… sure it will taste sweet but let’s make it ascetically sweet by making mini crumbles. And then, as if that wasn’t enough, we decided to bake the mini crumbles in mini mason jars. Yes, we know – mason jars are everywhere. So maybe we are a bit late to the party but better late than never, no?

Humble crumbles these are not. They are adorable, picnic portable and perfectly portioned. With a hint of orange zest and a toasty pecan crunch, these little gems will be a spring-time staple, guaranteed!

berries and rhubarb1

Mini strawberry-rhubarb crumbles

Yields 4 X 8 oz darling little mason jars

For the crumble topping

  • ½ cup flour
  • 1/4 heaping teaspoon salt
  • 1/4 teaspoon baking powder
  • 1/4 cup filled with brown sugar packed halfway, fill remaining with white sugar
  • zest from 1/2 orange
  • 1/2 stick unsalted butter, cold and diced
  • handful of toasted pecans, cooled and coarsely chopped

For strawberry-rhubarb filling

  • 7 oz rhubarb, peeled and chopped into 1/2 inch pieces
  • 12 oz strawberries, stems removed and quartered
  • zest from 1/2 orange
  • 1 1/2 tablespoons juice from orange
  • 1/2 cup extra fine baking sugar
  • 2 1/2 tablespoons cornstarch

Preheating oven to 350°F.

In a medium-large mixing bowl combine rhubarb, strawberries, orange juice and zest, and sugar. Mix ingredients by hand, tossing to ensure rhubarb and strawberries are thoroughly coated. Add the cornstarch and mix by hand again.

Spoon the mixture into mason jars, leaving room for the crumble topping. Try to spoon in only the coated fruit. Then, add a little bit of the liquid mixture on top. Place the 4 jars onto a baking sheet and place in oven for 30 minutes.

pots on the ready 2

To make the crumble, combine the following in a medium mixing bowl: flour, salt, baking powder, brown sugar and white sugar, and orange zest. Mix until all ingredients are incorporated. Use a pastry cutter to cut in the pieces of butter until the mixture is pea sized crumbles. Gently mix in pecans and then transfer mixture onto baking sheet and bake for about 20 minutes at 350° F. Check on the crumble periodically, using a spatula to flip mixture once it starts to brown. You’ll know it’s done when it’s toasty.

crumbly crumbles

Evenly spoon toasted crumble mixture on top of the strawberry-rhubarb. Let cool 1-2 hours before lightly covering or enjoy on the spot!


strawberry rhubarb mini crumbles

Have a wonderful week! XOXO, Bee & Em