have pie will travel

have pie will travel

Looking back to the summer vacations of my youth, I fondly recall the blistering hot days in New England when my mother and I would truck over to the u-pick berry farm and fill our bellies and pails with as many blueberries possible.  Most of the time the berries brought home were consumed by the handful. We enjoyed their perfection as nature intended.

No one complained that the berries weren’t safely nestled in pie crust because my mom never baked pie and we didn’t really know what we were missing. Don’t get me wrong, my mother is one of the best cooks ever. Her lasagna is so good that I can’t order it anywhere else because I’ll only be disappointed. But she’s never been much of a baker. Maybe it’s a sweet or savory thing. Sure, she makes brownies and sweet breads but never pies.

I get nostalgic for those hot summer days of blueberry picking. I miss the quietness of the farm. The scorching sun. Sweat mixing with sunscreen. Dusty feet in sandals. The long stretches of silence as my mother concentrated on picking out the best berries and I concentrated on stealthly eating more berries than the number that ended up in my pail. And consequently, my mother scolding me for eating too many berries.

Sure, I could drive up to the u-pick berry farms north of Seattle. But it wouldn’t be the same. Who would advise me not to eat all those blueberries? Gosh, I might not return with any… just a belly full of berries. And lately, I’ve been busy so it’s easier to run over to the traveling farmer’s market and pick up a few pints. As July runs out of days in the month it dawned on me that most of the berries purchased have been eaten by the handful. No berries have been safely nestled in pie crust. As a person who loves to bake, this feels almost criminal!

I know – I said I’d cool it on the baking for a little while but let’s be honest here, it was only a matter of time before I broke down and returned to the kitchen. (Must. Bake. Pie.) Plus, my hubby and I were getting ready for a road trip to Bend, OR (for yet, another wedding!) and I nominated myself to take care of the sustenance. The idea of a summertime road trip just beckons for a little picnic. And what picnic could ever be complete without something sweet? This road trip would be the perfect opportunity to try out blueberry pocket pies.

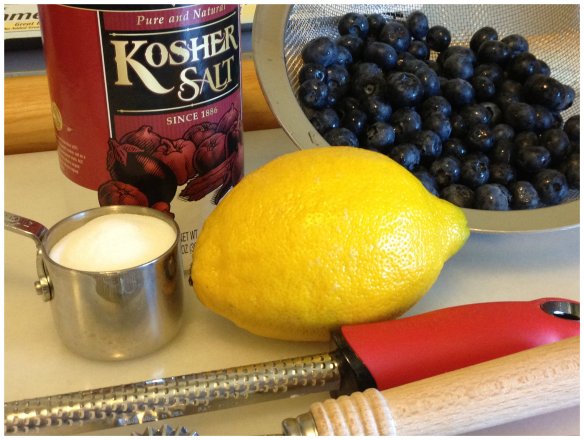
They are simple to make and super portable. All you need is love… and these ingredients:

all you need

Blueberry pocket pies

Yields 6 pocket pies

Ingredients

  • 2 cups fresh blueberries
  • 1/4 cup sugar
  • 1 tablespoon fresh lemon juice
  • 1 teaspoon fresh lemon zest
  • 1/4 teaspoon kosher salt
  • pie dough – insert your favorite recipe (I use a butter and shortening dough recipe)

Pre-heat the oven to 400°.

Mix the blueberries, sugar, lemon juice, lemon zest and salt in a medium mixing bowl. To reduce trauma to the berries, simply mix by hand.

When the oven is just about done preheating, begin to roll out the dough. It was hot in my kitchen so I needed to return the dough to the refrigerator several times to keep the dough cold.

Once the dough is rolled out into a long thin sheet, divide it in half and then into thirds. Then scoop berries into each section and form into pockets.

A break down of the steps to pocket pie:

step by stepBake the little pies in the oven for 35-40 minutes.

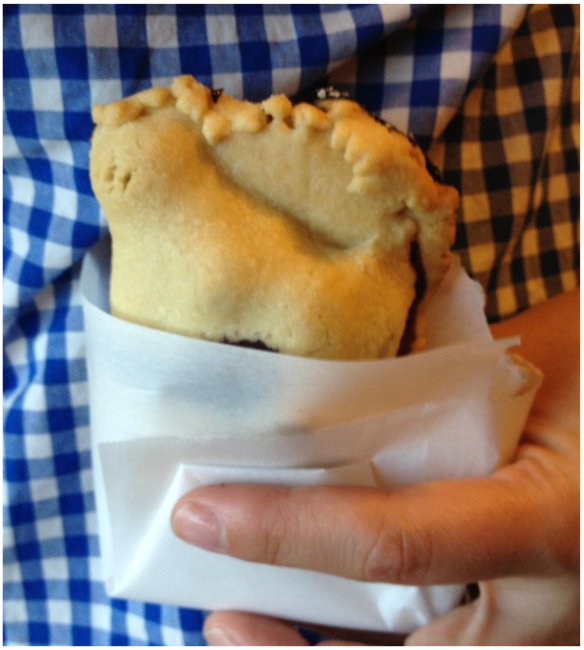
Here is the result of my first batch:
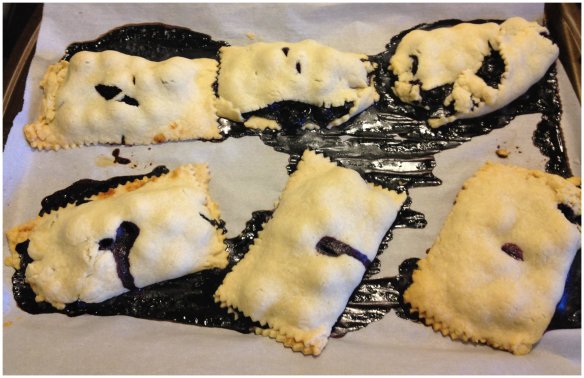
unciviled pocket piesI thought they came out rather uncivilized so I ended up making several batches. In the end… not a single batch looked perfect. I suspect it has something to do with the fact that I kept trying to over-stuff the little squares of dough with too many berries. But oh! The taste was heavenly. The crust was buttery and crumbly and the fruit inside was sweet but not overly sweet. The blueberry flavor remained true with just a zing of lemon. At some point I told my husband that these little pies were “pie-crack.”
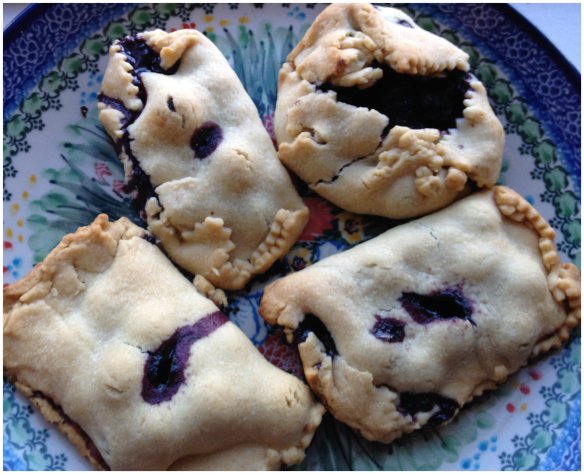
pies on a plateWe brought a pair of pies on the road trip to Bend. Between the piping hot coffee and the high I was riding from the pie – it’s a good thing I wasn’t driving.

I’m thinking about trying these out with sweet cherries or maybe a blueberry peach combo. Bridesmaid dresses (and any other fashion for that matter) be damned. I’m back in the kitchen baking and I’m going to enjoy the fruits of summer.

Have a super week!

XOXO, Em

let’s get crafty… DIY hairclips

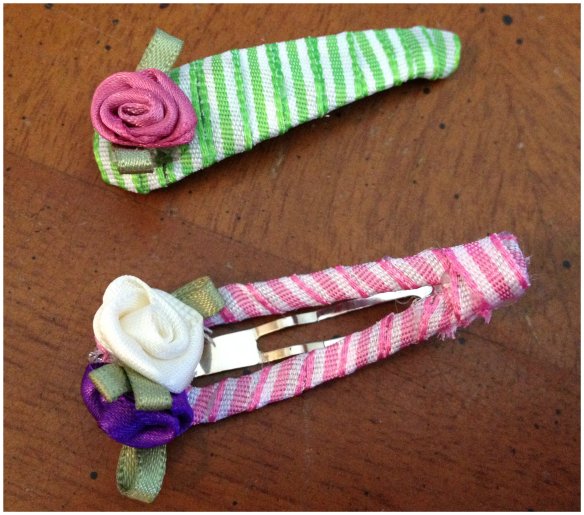
hairclips final product

While my husband and I have been attending weddings like weekend warriors – it’s been difficult to justify experiments in the kitchen. Yes, I’m human and can only dance off so many calories (and those bridesmaid dresses are never forgiving are they!?) Truly, it’s a bit necessary give the baking and ice-cream trials a rest.

Combine the wedding eating and drinking extravaganza with the baby bonanza that is erupting among the other half of my friends/family and we have a necessary project. Yes folks, it’s summertime and therefore, appropriate to bring us all back to our summer camp days. Gather ’round the picnic table – we are about to get crafty.

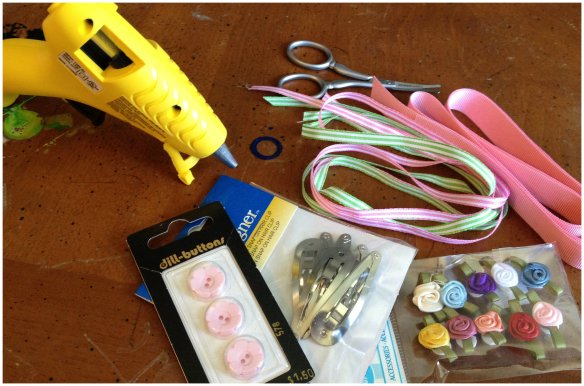
I had an idea of what I wanted to make for all the sweet baby girls that are about to arrive into the world (hair-clips!!) but I didn’t have any of the items necessary. So, I strolled over to the local fabric store, Stitches. They have a fabulous assortment of supplies and I purchased a small amount of ribbons, hair-clips and a few add-ons for about $6. Yes, you read that correct. $6!!! When does anything (let alone anything for a baby girl) cost $6? Almost never.

supplies hairclip project

The rest was easy and fun. I decided to cozy up to our “crafts” table (the table that my husband used as a child to paint his model airplanes), in the event that the project became messy. I plugged in my cheap-o glue gun, found a pair of sharp scissors and got to work.

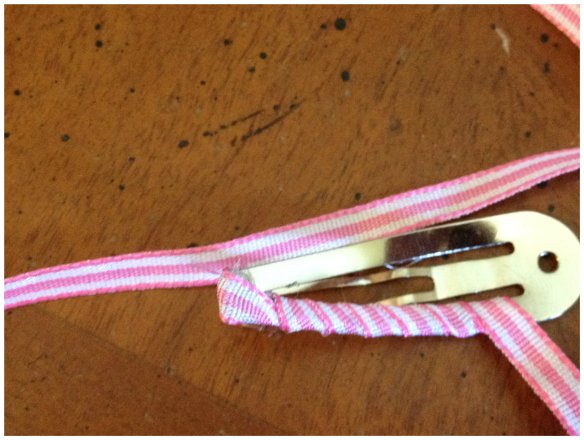
First, add a tiny dab of glue to the bottom of the tip of the hair-clip. Then, start to wrap the hair-clip with ribbon. Feel free to do a “practice wrap” before you commit to adding glue. Once you feel comfortable moving along, remember that it’s a good idea to add a bit of hot glue as you go. Stick to a system – ie. add a dab of glue on the bottom of the clip every time you wrap the ribbon around. This way the ribbon is secure along the metal clip. If you don’t add the hot glue as you go, the ribbon may slip and slide over time and the silver metal will be exposed.Collage 1 hairclipsCollage 2 hairclipsThat was easy, huh?

I’m pretty sure it took all of 5 minutes. So I made a second one. With pink, of course!

pink hairclipIt’s so simple (and cheap) and truly a thoughtful gift. As you know, I’m always a fan of a homemade gift. And I’m already dreaming up ideas for other barrettes and hairbands that would be super sweet. Big, poofy ribbon roses or sweet pink heart barrettes or we could go in an entirely different direction of whale ribbons for a preppy east coast nautical theme… the possibilities are endless!!!

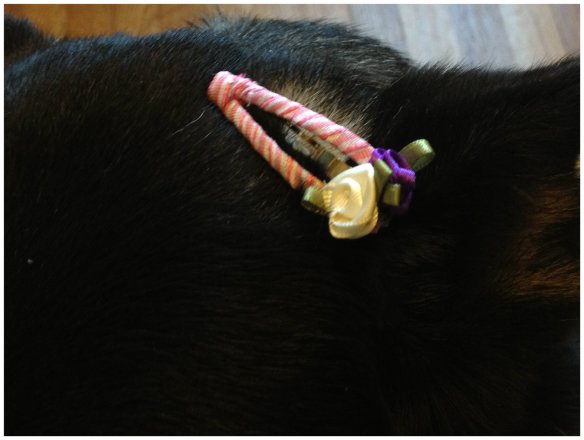
Since I don’t have a little girl – I had my Lucy dog model the hair-clip. She stayed still just long enough for me to snap a picture. Pretty cute, huh?lucy modellucy modelI think so too!

Good luck and happy crafting!

XOXO, Em

currently crushing on… all things lavender

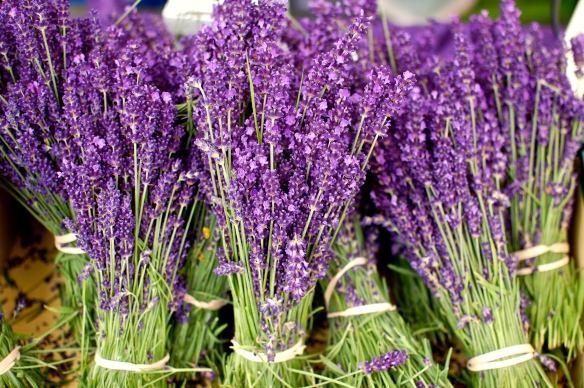
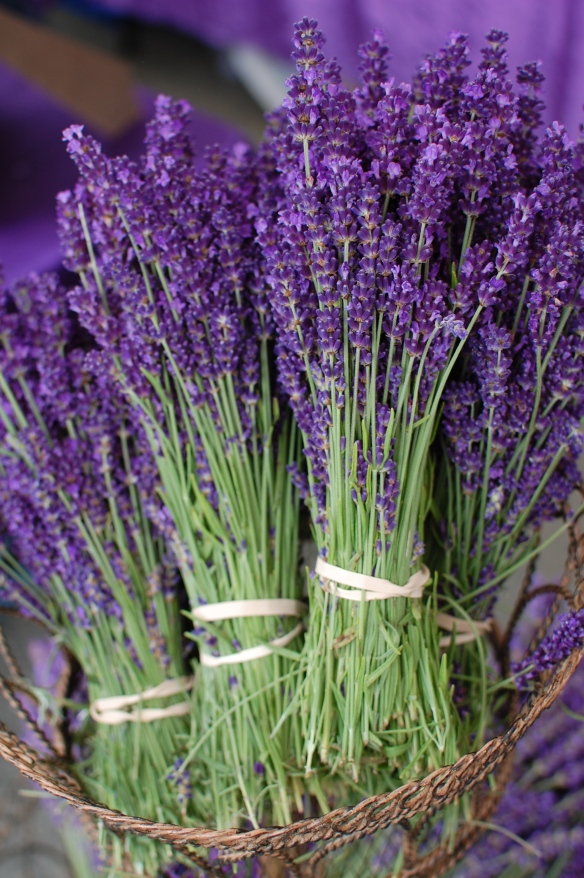
Lavender bouquets

It is no secret that I love lavender — whether it’s in the garden or in a floral arrangement or in my food and drink. Lavender simply works everywhere!

So somehow, it’s appropriate that I should be living in the Northwest, site of “North America’s lavender capital”. The Olympic peninsula of Washington state, and more particularly the little city of Sequim (pronounced “Skwim”), is famous for its production of lavender. So famous that each year, during the third weekend of July, a three-day festival celebrating “all things lavender” is organized.

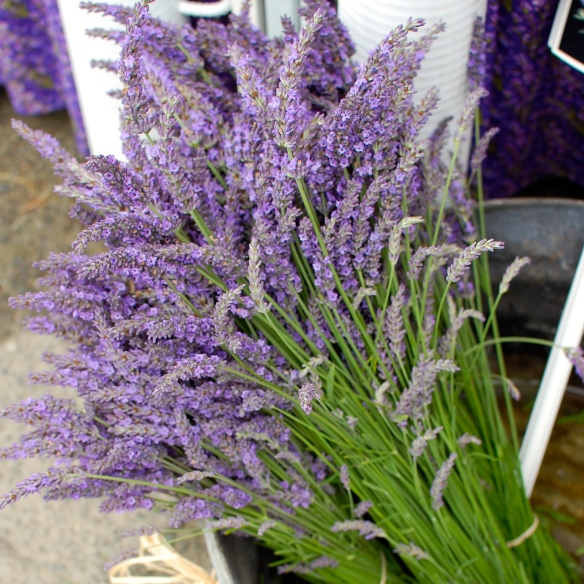
Lavender

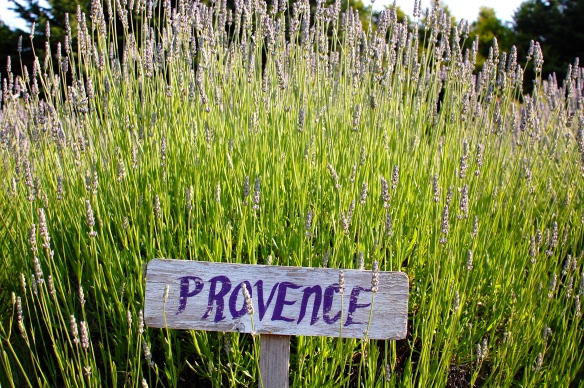
Historically, growing lavender in this region once dominated by dairy farms was not a natural choice, but it’s now a major agribusiness. The climate around Sequim was a determining factor. It is said to be similar to the one of the Provence region in France and it supposedly gets as little rain as Los Angeles. The Olympic Mountains act as a wall and protect the northeastern Olympic Peninsula from the bulk of the rain that moves into the Pacific Northwest. They call it the rain shadow. Let me express my doubts about that. The first time I visited Sequim, it was pouring. The second time, it was only drizzling. This year the expectations are high: I want to finally see Sequim’s sunny side. The weather has been gorgeous in Seattle, and with any luck it’s the same in Sequim.

Provence

So today, I’ll be harvesting fresh lavender in the farms and will be on a lavender high for the rest of the weekend. I can already smell the intoxicating perfume of fresh lavender.

Lavender in a basket

The Sequim region during the festival weekend would be a perfect getaway if it weren’t for the crowd. Thousands of people are expected during the festival. My advice: If you’re not interested in the festival activities but just in the market for some fresh lavender, come back the next weekend. Many farms welcome visitors and some even offer bed & breakfast accommodations.

Have a great weekend!

Bee

Currently crushing on… liberté!

eiffel tower

Fireworks in Paris – Photo by Flickr user oleg.ski

It’s that time of the year when streets in France turn into blue, white and red, the champagne flows, military forces parade on the Champs Élysées, the café waiters race with their loaded trays,  and people go dancing at firemen’s balls before watching the fireworks. And flags are on full display. It is as patriotic as France can get.  Le 14 juillet, also known anywhere in the Anglo-Saxon world as Bastille Day, is for sure the ultimate French celebration.

Growing up, I never really cared about it. A holiday in the middle of my two-month summer vacation did not make much of a difference. But now that I’m far from my country, thinking about it makes me sort of nostalgic and longing for some French spirit.

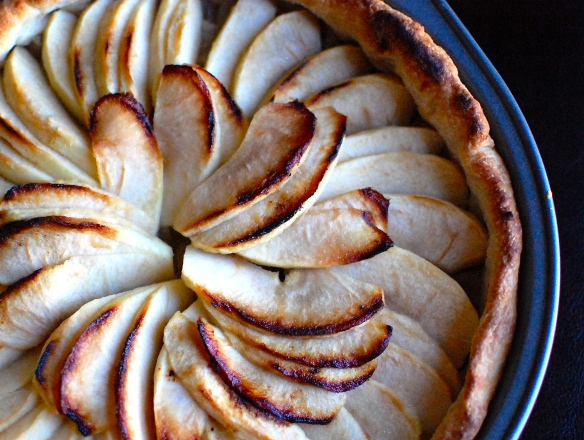
tarte aux pommes

A French classic: the tarte aux pommes (apple tart)

If you want to indulge in French lifestyle and catch a glimpse of this holiday, there is a good chance that something is organized not far from where you live. Major cities will have some kind of event. In Seattle, there will be a Bastille Bash in Madison Valley, a day early, on the 13th, and a pétanque tournament on the 14th. Personally, since I’m always looking for an excuse for a soirée, I’ll be throwing a “down with tyranny party”, a commemoration of both the 4th and the 14th of July, to celebrate the glorious liberation of our respective homelands from oppressive and unjust rule. If there is one thing that France and the United States have in common, it’s their revolutionary spirit!

If you feel like celebrating too, here are some ideas:

We’ll be drinking the Liberté cocktail, a mixture of gin and lillet.

There is no specific food tradition associated with the 14 juillet, but here are 10 French classic recipes that will take you to Paris.

A video of the military procession — it is quite long…

No good 14 juillet without playing pétanque.

How to celebrate Bastille Day in Paris.

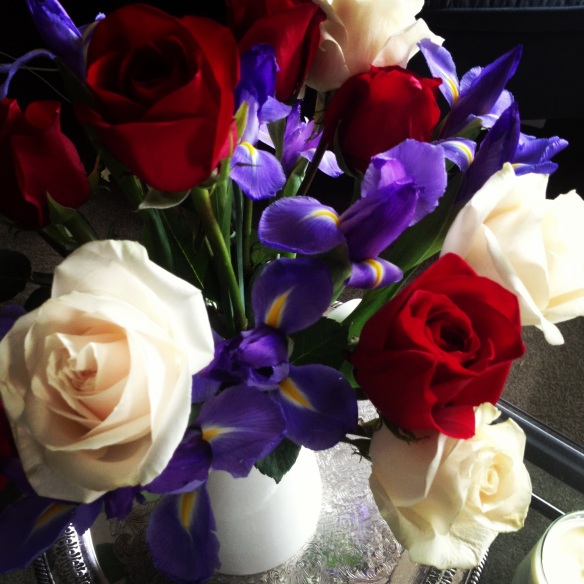
blue-white-red flowers

Blue, white, red flowers for Bastille Day

Have a great weekend and Vive la France!

Bee

goat cheese blueberry honey ice cream, philadelphia-style

goat cheese blueberry honey ice cream

Did you know that July is National Ice Cream Month? And that the third Sunday of the month is National Ice Cream Day? President Reagan called for all people of the United States to observe these events with “appropriate ceremonies and activities.” So Em and I decided to have an ice cream week. But it’s really because President Reagan wanted us to do so.

Following Em’s experimentations with the ice cream maker, I felt suddenly inspired to come up with my own flavor, and, taking advantage of Em leaving the city for the weekend, I proposed to “take care of” our new favorite kitchen item. This is I think the start of a long love story. But this love story is unfortunately doomed: Besides the fact that I have to give back the machine, my kitchen does not really have the space to welcome it. And my freezer is so small that it makes the storage of the bowl and the ice cream almost impossible. In the meantime, I’m satisfied knowing that it is available five floors up. Em does not know it yet, but her kitchen has just become an extension of mine.

blueberries

Over the weekend, I tried one recipe: goat cheese blueberry honey ice cream, aka taste-bud paradise. I know this combination might sound strange, but it’s delicious. The inspiration came from one of the best ice cream shops I’ve been to: Salt & Straw in Portland, Ore. This shop alone would be enough of a reason to visit Portland. I once tried their blue cheese pear flavor and it simply stole my heart! The hubby was not convinced, but he does not like blue cheese anyway. Not sure what’s wrong with him…

Salt & Straw

Anyway, as the good French girl that I am, I’ve always been obsessed with cheese pairing, trying all sorts of savoury sweet combinations. My latest crave: cantaloupe melon, feta and mint. Irresistible! And what’s better for dessert than some goat cheese with walnuts and a drizzle of honey? Keeping that in mind, I had a feeling that the lactic, citric tang of a mild goat cheese would pair perfectly with the tart-sweet blueberries. Add some honey (or lavender honey if you have some) for a bit of sweetness, let the machine do its trick and wait with spoon in hand (I did!).

I used Em’s egg-free base made with whole milk and cream but added some goat cheese  for a dreamy creamy texture. I really waffled on whether to add egg yolks. We all tend to think the richer the better, and it’s true that a custard-based ice cream (French-style), because of its higher fat content, will maintain a softer, creamier texture when frozen. But the fat also tends to mask the flavors of the other ingredients. The eggless version has a delicate taste and a milky smoothness and is apparently called Philadelphia-style ice cream.

Philadelphia-style ice cream

Instead of just adding whole blueberries, I cooked them in a pan to get something in between a coulis and a jam. Just to add some texture to the ice cream.

For better results, pre-chill all the ingredients overnight.

Goat cheese blueberry honey ice cream

Yields about 2 quarts.

Ingredients

  • 1 cup whole milk
  • 1 tablespoon honey (or lavender honey)
  • 1/2 cup granulated sugar
  • 4 ounces young mild goat cheese
  • 2 cups heavy cream
  • 1 pint fresh blueberries
  • 2 tablespoons water
  • 1 tablespoon honey

Combine whole milk, honey and sugar in a small sauce pan and bring to a simmer over medium-high heat. Stir to dissolve the honey and sugar.

Put the goat cheese in a large bowl, pour over the warm milk, and mix together until smooth. Incorporate the heavy cream, let cool and refrigerate overnight.

Prepare the blueberry “jam”. Place the blueberries in a saucepan over medium-low heat. Add water and honey and bring to a simmer. Let simmer for about 15 minutes until most of the liquid evaporates, occasionally mashing the mixture to the desired consistency. I personally prefer keeping some texture. Let cool and refrigerate overnight.

blueberries

The next day, pour the goat cheese mixture into the freezer bowl and start churning. When the mixture is already quite thick, add gradually the blueberry puree. Once churned, transfer to an airtight container and let the ice cream solidify for few hours in the freezer. Before eating, put in the fridge for 20 to 30 minutes to soften the texture, and then start scooping.

The result: To be honest, Philadelphia-style ice cream is best eaten right out of your ice cream maker or after a few hours in your freezer (but still great after few days, and I’m currently writing this post while eating ice cream, for breakfast!). The ice cream was intensively flavored and smooth, more refreshing than a custard-based ice cream and a bit lighter (but still very rich thanks to the goat cheese and cream). Enjoy!

goat cheese blueberry honey ice cream 2

let them eat ice cream (for the pool-less on a hot day)

photo (1)

A recent acquisition in my kitchen is an appliance that I probably would never purchase. It is, however, an appliance that someone might buy raffle tickets to win but after the excitement of the prize, it might sit in the basement, forgotten about until spring cleaning. That someone is a very kind colleague and the prize appliance is the Cuisinart Soft Serve Ice Cream Maker. My colleague asked if I would like the long forgotten ice cream maker. Without any hesitation (who would hesitate? It’s a FREE ICE CREAM MAKER!) I said yes and long story short, I, Em of deuxdilettantes, am the proud owner of a soft serve ice cream maker.

The timing of this addition to my kitchen couldn’t be any more perfect. With the recent change of temperature (hello Lake Washington, my savior from the heat), a bit of homemade ice cream felt just right. I invited Bee to join me in the christening of the ice cream maker. The whole event was a bit comical. It must have been 90 degrees in my flat. I don’t have AC and the windows hardly open. We watched the neighbors frolic in their pool as we made ice cream and wondered if we could tempt them with cool treats so that we might take a dip in the refreshing water. I’m pretty sure we made all the rookie mistakes as we created a lovely ice cream mess in my kitchen.

IMG_2473

It was messy (and that picture was taken after we cleaned up) but we had a blast. And we ended up with darn good ice cream.

Even if your not crazy about our flavor combinations, at least consider the following two tips:

1. The freezer bowl MUST be cold. The owner manual suggests 12 hours in the freezer but I suggest 24 hours just to be safe.

2. Adding anything solid (dare I suggest chocolate chunks?!) to the milk/cream liquid mixture WILL clog the machine and create a mess. We suggest allowing the mixture to thicken and then add, slowly.

photo

Lavender cardamom vanilla with chocolate chunk ice cream

Yields 1.5 pints

Ingredients

  • 1 cup whole milk (plus extra)
  • 1/4 cup lavender
  • 10 pods cardamom (split open)
  • 1/4 teaspoon vanilla
  • 1/2 cup sugar
  • 2 cups heavy cream (very cold)
  • 1/3 cup coarsely chopped dark chocolate

1. Combine 1 cup milk, lavender, cardamom and vanilla in a medium sauce pan. Bring to simmer and then reduce heat to low / low-medium. Gently stir and cook for about 20 minutes.

IMG_2458

2. Strain mixture and discard lavender buds and cardamom pods. Pour the mixture into a measuring cup and top off milk mixture to measure 1 cup. Put in refrigerator or over an ice bath.

3. Once milk is cold, pour into a mixing bowl and add sugar. Whisk or mix until sugar is dissolved. Then add cream. Mix and pour into freezer bowl. Turn on ice cream machine and let it do its magic.

4. As the milk/cream mixture starts to thicken to a soft serve consistency begin to add chocolate chunks a small spoonful at a time. Once the mixture is past soft serve consistency but prior to ice cream, turn off the machine and begin to scoop out ice cream into a freezer safe container. Freeze until mixture has hardened and then serve! Or serve immediately as soft serve!

Dutch chocolate with cinnamon and chocolate chunk ice cream

Yields 1.5 pints

Ingredients

  • 2/3 cup unsweetened Dutch processed cocoa powder
  • 1/2 cup sugar
  • 1/3 cup firmly packed brown sugar
  • 1 cup whole milk (very cold)
  • pinch cinnamon powder
  • pinch cayenne pepper
  • 2 cups heavy cream (very cold)
  • 1/4 cup coarsely chopped dark chocolate

1. Combine the cocoa powder with sugars in a medium bowl. Mix until lumps are removed.

2. Add the whole milk and mix until smooth. Add cinnamon, cayenne and heavy cream. Mix and pour into freezer bowl.

3. Turn on ice cream maker and allow to mix.

4. As the milk/cream mixture starts to thicken to a soft serve consistency begin to add chocolate chunks a small spoonful at a time. Once the mixture is past soft serve consistency but prior to ice cream, turn off the machine and begin to scoop out ice cream into a freezer safe container. Freeze until mixture has hardened and then serve! Or serve immediately as soft serve!

DSC_2914

Strawberry with balsamic caramel ice cream

Yields 1.5 pints

Ingredients

  • 1/3 cup and 2 tablespoons granulated sugar
  • 1 tablespoon water
  • 1/3 cup balsamic vinegar
  • 1 cup whole milk (very cold)
  • 1/2 cup firmly packed brown sugar
  • 1 teaspoon vanilla
  • 2 cups heavy cream (very cold)
  • 1 pint strawberries, hulled and pureed

1. Combine the granulated sugar, water and balsamic vinegar in a shallow pan. Bring to a boil and then reduce heat. Let simmer for about 15 minutes – until the consistency is thick and syrupy but not yet a caramel. Remove from heat and pour into a heat safe container. Set aside and allow mixture to thicken as it cools.

2. In a medium mixing bowl, combine the whole milk, brown sugar and vanilla. Whisk or mix until smooth. Then add heavy cream. Stir and then add to freezer bowl. Start mixing and as mixture thickens begin to add the strawberry puree, slowly.

DSC_2955

Allow mixture to continue to thicken and then slowly add the balsamic caramel.

DSC_2968

Once the mixture is past soft serve consistency but prior to ice cream, turn off the machine and begin to scoop out ice cream into a freezer safe container. Freeze until mixture has hardened and then serve! Or serve immediately as soft serve!

DSC_2982

As I write this, I realize that over the past week I have eaten more ice cream than I should ever admit to. But hey, that was all for research! It doesn’t count. We are dreaming up all sorts of ideas for the machine. There has been discussion of coconut milk… almond milk… sorbets… oh the possibilities!

Have a lovely week and stay cool. And eat ice cream!

XOXO, Em